Setting up Kali using VirtualBox
So this short blog post is about setting up Kali in VirtualBox. I had a few problems with networking, but the process is overall very straight forward. There are various guides out there, but it seems there are almost always unaddressed issues.
At first I actually tried in VMware, but couldn’t quite get the networking right. VirtualBox just turned out to be easier, and VirtualBox seems easier to work with from a Vagrant perspective, which is also a huge bonus.
For odd problems your having, such as networking or installing packages afterwards, see the bottom of this post.
1) Download VirtualBox
You can download VirtualBox at https://www.virtualbox.org/wiki/Downloads
2) Download Kali Linux Distro
You can find the newest Kali version (currently 2.0) at https://www.kali.org/downloads/
3) Create new VM in VirtualBox
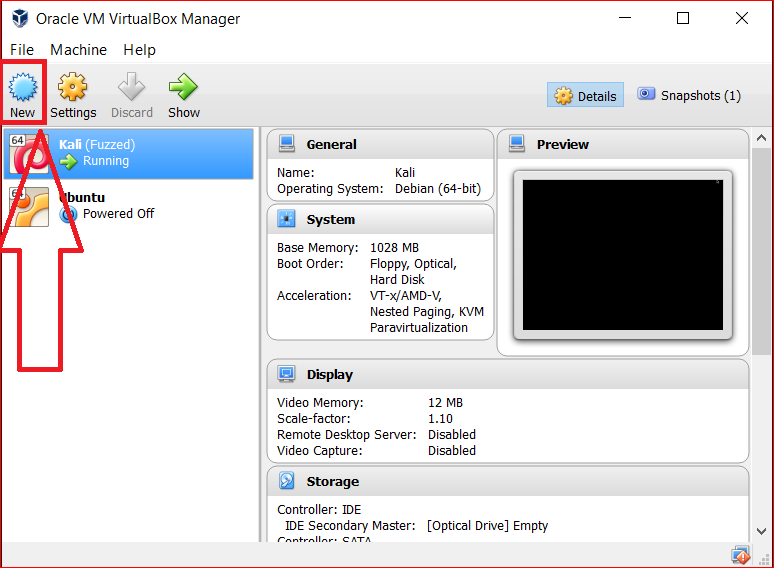
Install VirtualBox through the prompt wherever you want. I tend to install it on my second disk or external hard drive where I have several Terabytes of space. Now once you open Virtualbox, you’ll see an option to create a new VM:
Next, you’ll see a prompt about naming and identifying the operating system:
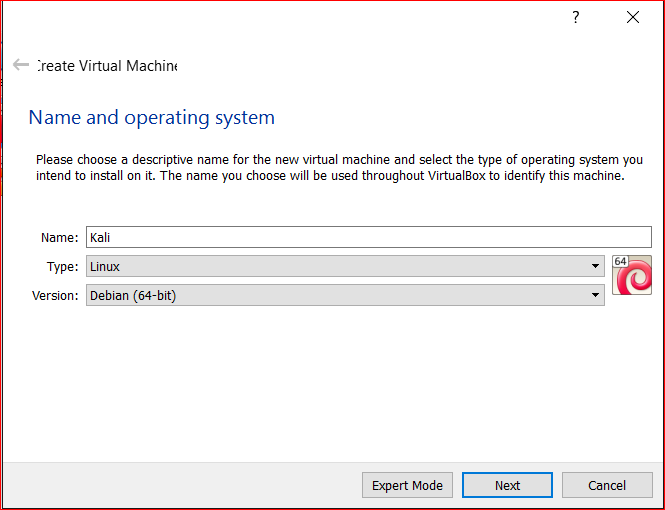
Name it whatever you want, but the OS type is Linux, and the specific verson is Debian x64 (or x32 if you chose the 32 bit version. Don’t choose the 32 bit version).
After this you set the RAM you want to give the VM. This very much depends on the individual. I often have a lot of things running on my host machine and don’t really need that much, so I give mine 1GB on an 8GB RAM machine. You might want to do more, although VirtualBox itself tells you what you should do at most (indicated by the red line on the scroll bar).
Next you will need to create a new hard disk. This prompt will ask what type of hard disk file type. If you always plan on using VirtualBox, the default is fine. If you think you might want to try VMware in the future, use the VMDK format. It’s a standard format that would make that process easier. Next, use Dynamically allocated (the default), and allot space to the VM.
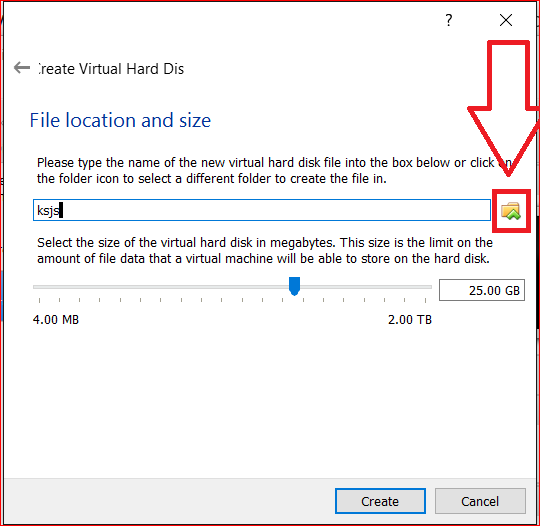
The space allocation also depends on the individual, I generally do 20-30GB per VM, although if I know I’ll be working with big data I sometimes go up to 200. If you have Terabytes, this doesn’t matter as much. You also name the VMDK here, which I normally use the same as the VM name. You can also set where you want to store the VM on this prompt by clicking the small folder in the top right:
You can now turn on the VM to get started installing Kali!
4) Install Kali on the VM
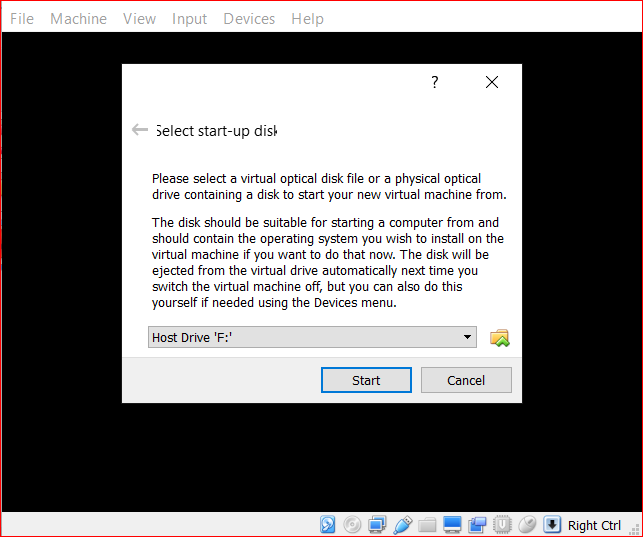
When you power on the machine, it will ask you to select an image to use. Click the folder once again to select the kali .iso you downloaded earlier:
After selecting the ISO, you will be presented with the Kali install screen. Choose Graphical Install like so:
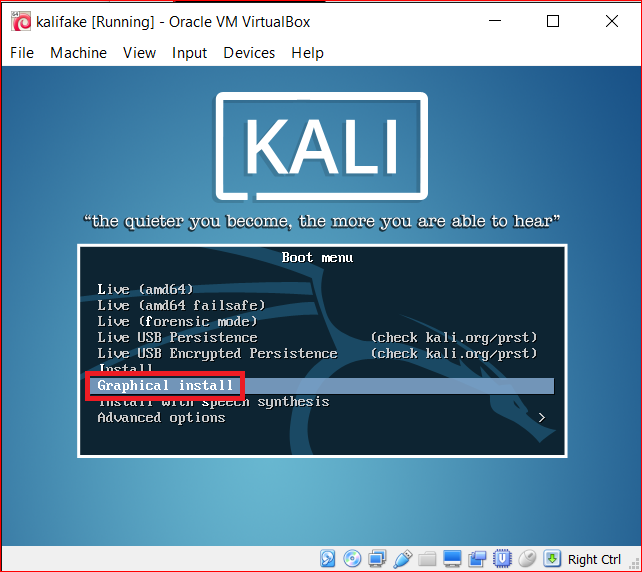
*Also note, to exit the VM to be able to work on your host computer, use the right ctrl button. That is the escape key in VirtualBox. In VMware it’s Ctrl+Alt.
As you go through the prompt, most of it is self explanatory. I normally make my hostname kali or home, just something short and simple. Don’t enter anything for the domain name, as you aren’t in a domain. If you were you probably wouldn’t be reading this tutorial.
For partitioning the disk, you should use the Guided - use entire disk and set up encrypted LVM option. Continue through the prompt, and write the changes to disks and configure the LVM. When everything is done, you should be able to boot into kali and get to the desktop!
Snapshot!
Lastly, make sure you snapshot your new machine! This backs it up in case you mess up and you want to go back. It’s a good idea to snapshot often, although definitely do before any major changes. You can snapshot by selecting the VM in the main interface, then going to Snapshots in the top right of the screen.
FAQ
My networking doesn’t work!####
My networking in VMware was terrible, that’s why I switched to VirtualBox. Normally it should work automatically. To edit the networking settings and other settings of the VM (make sure you know what the defaults are), when the machine is powered off you can go to Settings in the main interface.
To edit the network, go the Network in the settings. If should say Adapter 1 is enabled, and attached to NAT. Bridged networks are harder to get working, and not the way you want to go starting out.
I can’t apt-get install anything, every package is not found
I’ve had this with recent kali installations I’ve used. It seems for some reason my sources.list doesn’t contain the right reference. To fix, open up terminal and type (case sensitive):
cd /etc/apt
vi sources.list
i
Yes, type the ‘i’ as well.
Then go to the bottom using the arrow keys, as your mouse doesn’t work in terminal. Add this line to the bottom:
deb http://http.kali.org/kali kali-rolling main contrib non-free
deb-src http://http.kali.org/kali kali-rolling main contrib non-free
You should now be able to download packages normally. You can check Kali’s official site for the correct source. It’s updated periodically with new releases.
If packages still aren’t found, you can always google for them, download the .deb, and install manually, which is how apt-get works under-the-hood.
What should I do first
Probably install and update things. First thing is
sudo apt-get update
I also install tmux as soon as possible, because it’s awesome:
sudo apt-get install tmux
Also just reading about the kali tools and looking through the docs is always a good idea.
Thanks for reading and happy hacking.